Shimoda Explore 40 camera backpack review
The best backpack for photographers?
Shimoda Designs introduced their first camera backpacks, the Shimoda Explore 40 and the Shimoda Explore 60, with a Kickstarter launch in 2017. I feel very honored to be one of the first to review the Explore 40.
For years, I’ve been looking for the perfect camera backpack for my photography day trips. I have tried different brands and models, but I haven’t been able to find one yet that I really felt comfortable carrying and using. Like with beds and mattresses, I sometimes feel like the Princess and the Pea. I have owned and used the very good LowePro’s Slingshot 202AW (currently replaced by the slightly larger and Flipside Sport 20L AW and the near-perfect F-Stop Gear Guru UL 25L. None of them felt if they were comfortable enough for me and I missed extra space to carry other things. I needed a larger volume backpack to carry my photography gear comfortably on longer hikes, including my gripped DSLR, two or three lenses and tripod, with an additional jacket or layer, my CamelBak hydration bag, some food and other small things, like a filter set etc.
I must admit, expanding my camera gear through the years didn’t help very much in sticking with a backpack. So I have been on the quest for a while to find a better fitting camera backpack. My wish list: It had to be lightweight, waterproof (preferably without an additional rain cover), with ample space and a flexible layout. The F-Stop Gear Loka UL with its content of 37L. seemed a great choice, because I already own the F-Stop Guru and I like the quality and design of the F-Stop Gear backpacks. They also provide a flexible layout with their versatile ICU’s (Internal Camera Units).
Then I heard a rumour that a well-known designer was working on the Shimoda Explore 40 camera backpack. It had to become the mother of all backpacks, the über photography backpack, the best backpack for photographers… Was my pea finally going to be crushed?
Find the Shimoda Explore 40 backpack on the official website of Shimoda Designs and shop for Shimoda camera backpacks on Adorama
The Shimoda Explore adventure camera bag discovery
 I contacted Ian Miller, Head of Design until 2016 for F-Stop Gear in Japan and founder of the startup company Shimoda Designs. He told me that he had started his own company from his home in Hakuba, a small ski area village in the Japanese North Alps. Ian is a very talented designer with a fantastic track record. He is also a professional photographer and he knows from experience what people need in a camera backpack. Besides designing and photographing, he loves to play in the mountains: trekking/camping, snowboarding, mountain biking, running and traveling. So he has always been able to test his designs to the extreme in a variety of conditions.
Ian confirmed with enthusiasm the imminent Kickstarter launch of two Shimoda Explore adventure camera bags and he gave me all the specifications which sounded very impressive. The new backpacks were designed in cooperation with a team of professional photographers: Levi Allen, Colby Brown, Colin Adair, George Karbus, Adam Clark, Mason Mashon, Paris Gore, Jay and Varina Patel, Scott Serfas, Michael Shainblum, Jeremy Koreski, Mattias Frederiksson and Dean Leslie. Shimoda has also teamed up with MAC Group US, a photo distribution and marketing company based in NY to handle logistics, operations and supply chain. Sounded solid to me, I couldn’t wait to test the Explore!
Two months later, a large box arrived from Japan I was pleasantly surprised. Ian sent me a pre-production model of the Shimoda Explore 40 backpack in the colour Blue Nights so that I could test and review it in our typical Dutch weather conditions. What else was in the box? One Medium Core Unit, two Small Core Units and an Large Accessory Case. My first unpacking impression: this is one serious backpack, I like it already!

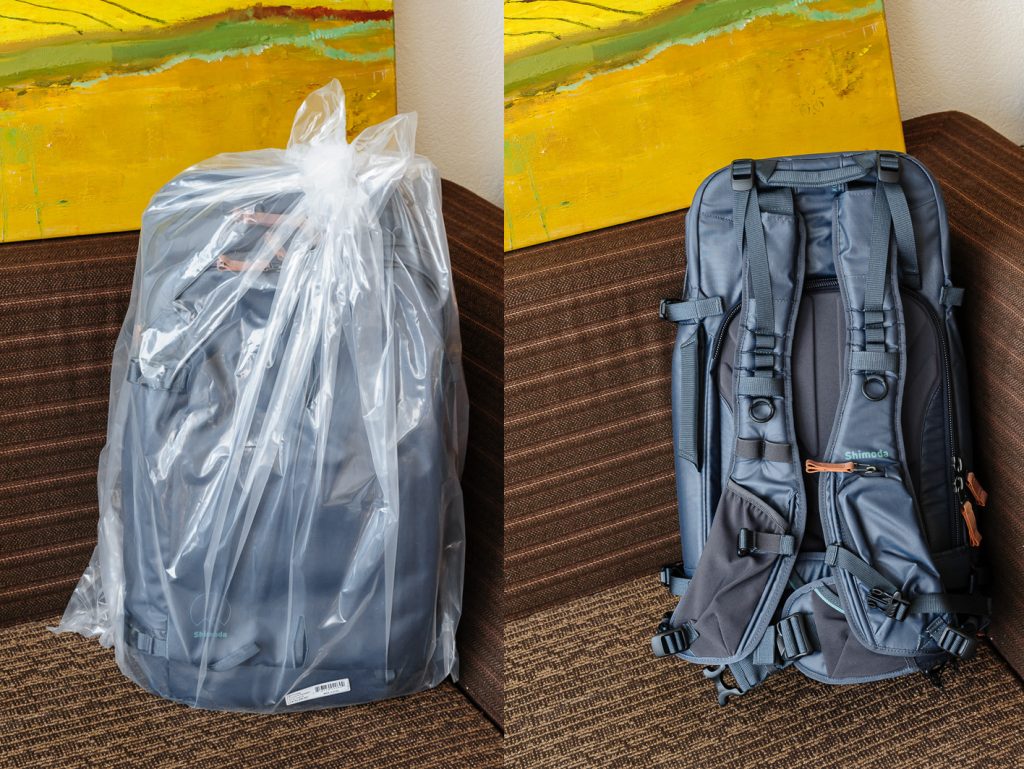
Shimoda Explore 40 backpack specifications

The Explore backpack has a ripstop nylon shell with two coatings of carbonate ether resin. Well that’s a mouthful. Shall we just call it waterproof? Shimoda uses YKK Splashguard (RCPU) zippers with stylish genuine leather zipper pulls. These zippers help to prevent rain, snow and sand from entering the bag. I trust that I can thoroughly test this in our little wet country and during my travels. The Explore 40 already had its victorious maiden voyage in a massive rain shower during one of my walks in the open Dutch countryside in the North of Holland, when I was scouting for some typical Dutch windmill scenes. You can read more of that further in my review.
Shimoda Explore 40 design and customization
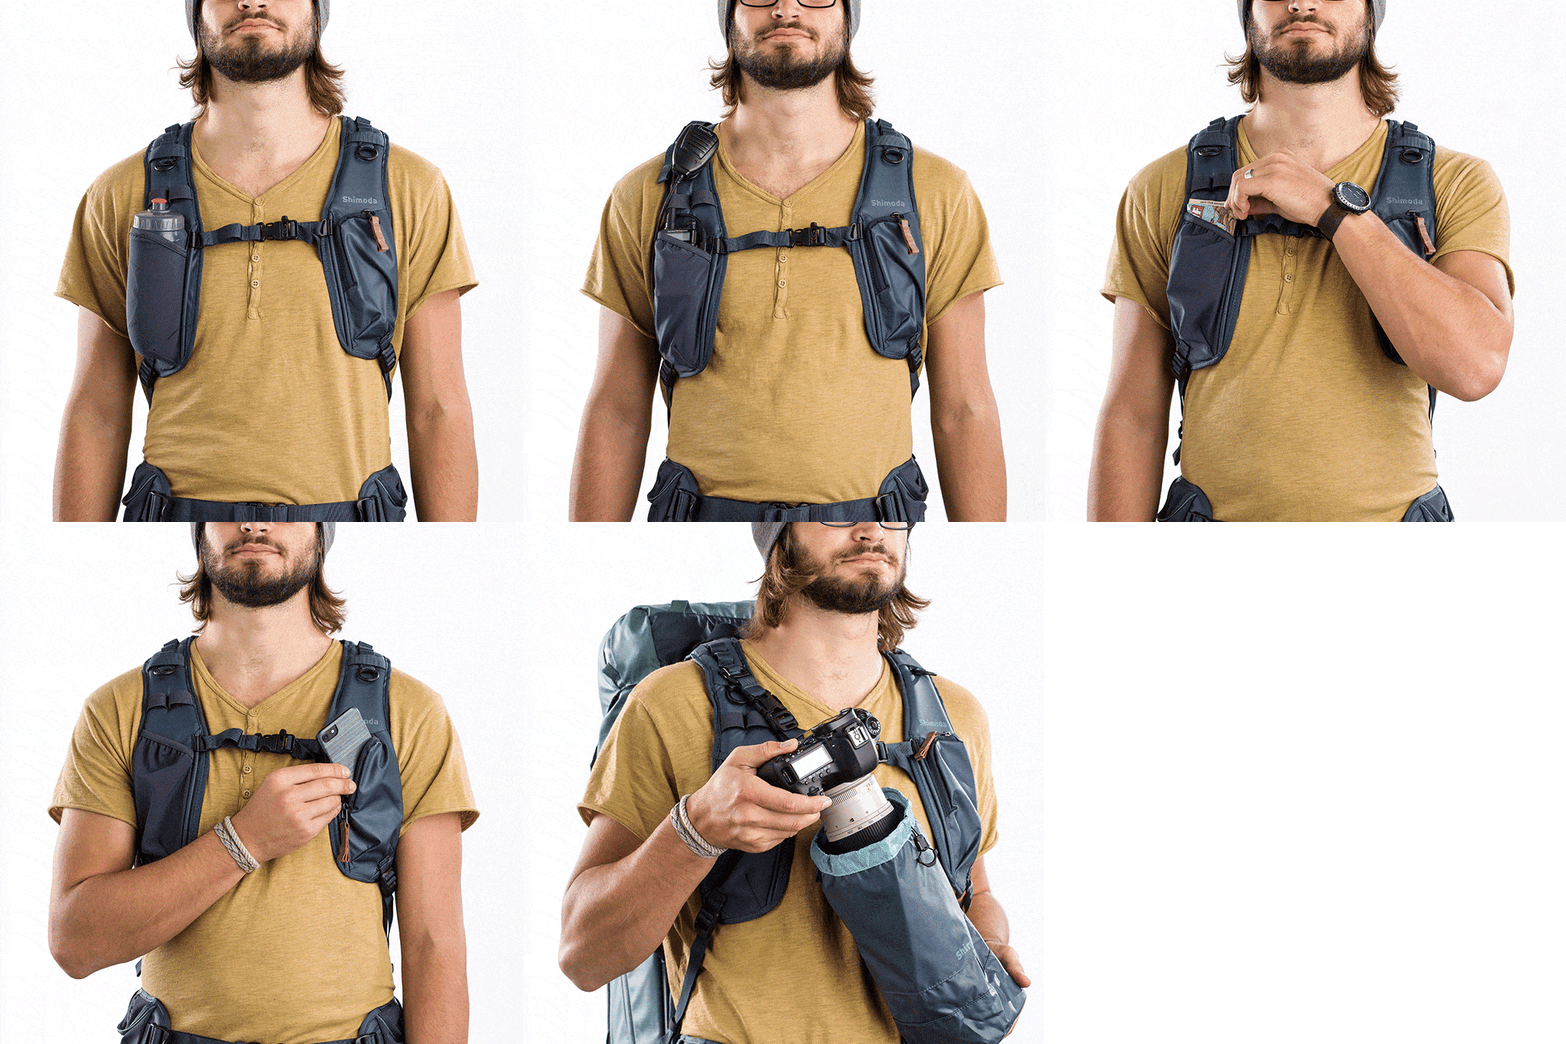
Photo courtesy of Shimoda Designs
Back to unpacking and adjusting my new backpack. In a matter of 15 minutes I had adjusted the pack to my body size, with the multi-adjustable harness. The padded shoulder straps, which are designed to help balance weight across your chest, have four height adjustments and will provide a perfect custom fit for every photographer. To my findings, this is a real plus over other brands that have the straps sewed to the top of the backpack in a fixed position.
You can see the adjustment possibilities in the product video from Shimoda further of this page. The removable 6061 T6 Aluminum frame comfortably distributes the load of heavy gear off my shoulders and to my hips. All these features work together to minimise shoulder strap stress.
Each shoulder strap features a fast access sleeve for commonly used items. The left strap includes a zippered mobile phone pocket that has a cable routing port to connect a charge that can be placed in the large side pocket of the pack. My iPhone 6Plus only fits in the phone pocket without my BookBook case and it’s a very tight fit. Luckily, this case has a removable protective shell that I can leave on my phone. The BookBook holding my ID and cards will have to travel in the upper lid pocket.
The right shoulder strap has a stretch spandex sleeve that can accommodate snacks, a small water bottle, sunscreen or radio. It is very handy to have key items within easy reach, for instance to use your phone’s GPS or if you need to refuel.
Main compartment and Core Units
At first, I left the two small Core Units in their plastic wrappers. They were too small anyway or best suitable for a mirrorless system, I thought. I unpacked the medium core unit. That’s more like it! All units have a removable nylon skin which you can zip on for dust free storage. I took it off but I’m keeping it in my bag as extra protection for when I visit sandy or dusty places. A fun and handy option is to use the removable skins as a packing cell for an extra layer or other items.
The inner lining of the core unit has a subtle light blue colour, so that you can easily see the items stored in it. I spent some time rearranging the dividers for my preferred gear configuration, and then it was time to see how everything would fit in the pack.

Video courtesy of Shimoda Designs
The main compartment of the Shimoda Explore 40 holds the medium core unit, and I soon found out that it can additionally hold one of the small core units. Wow! Let’s be careful with this. It’s like with car holidays, you keep filling your car up with stuff and in the end, you have taken twice the load but could have managed with half. To try out the space of this bag, I used the small unit to carry my 80-200mm lens, and there was still some space to put in other small things. I placed it on top of the medium core unit. The medium core unit is usually filled with my gripped DSLR, my 16-35mm lens and my 24-70 lens, my ND filter kit, my polarisation filter, my Manfrotto l-plate, a memory card case, my wired remote, my Hoodloupe and my Lenspen cleaning kit.
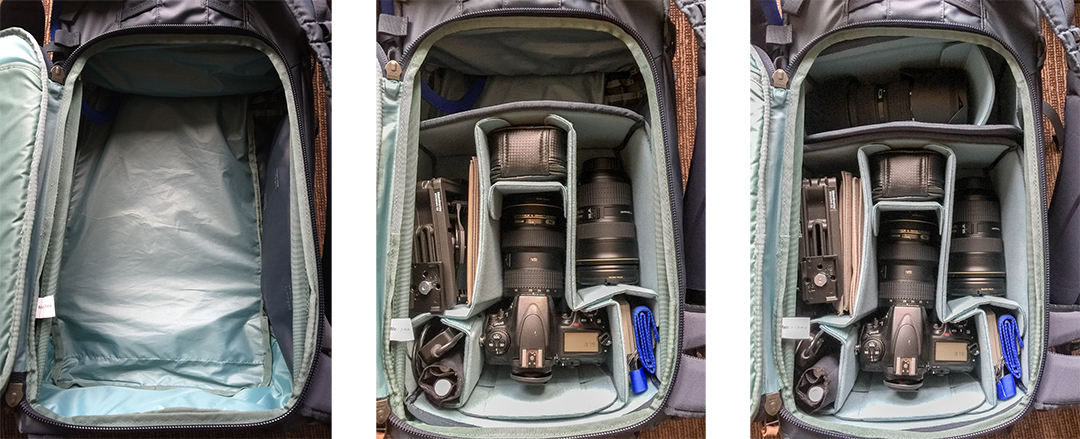
The Shimoda Explore 40 main compartment without a core unit, with the medium core unit and with the medium core unit and the small core unit
The main compartment is also accessible from the top of the bag, through a YKK Splashguard zipper. If you are not using the small core unit on top of your medium core unit, there’s plenty of space there for things like a jacket, an extra layer, some food etc. Just remember that during your hike, smaller things can fall down in front or behind the core unit and may be harder to find during your hike.

Photo courtesy of Shimoda Designs
Multi configurable front panel
The front panel webbing attachment system allows you to carry various photography and mountain tools on the exterior of the pack. You can secure a tripod, a snowboard, skis, ice axes, etc. Each strap features a glove-friendly YKK side-release buckle. When you don’t use the straps, you can lead them through the front panel.
Large front panel pocket
The large front panel pocket also has a YKK Splashguard zipper. The pocket is multifunctional and you can store an extra layer, a jacket, avalanche safety equipment or a laptop in a padded case. My 15 inch laptop in its case hardly fits, but I wouldn’t feel very comfortable in carrying it in this pocket, since it feels just a little bit too tight. I didn’t expect it to fit anyway, and I’m not looking for that option in my backpack because of my laptop size, so for me this is no problem. If you own a 13 inch laptop with a sturdy case, I believe you will be comfortable in placing it in this pocket, but you would better go for safety and carry it in the pack panel pocket.
The front panel pocket also features a loop to hang in you hydration system. There is a hose routing through the backpack. It helps if your system has a detachable hose like with my CamelBak, since the velcro exit hole is quite narrow for the mouthpiece. When you start the routing of your hose from the outside of the bag, the process is easier.

Lid pocket with sub-sleeves
The lid pocket has a YKK Splashguard zipper. This is a quick access pocket. It is designed to ensure items will not fall out of the pack even when accidentally left open. There is plenty room for energy bars, gloves, sunglasses, a headlamp etc. Inside this pocket, zippered mesh sub-pockets provide even more safety and organisation for less commonly accessed items like a head lamp, business cards, pens, your keys and money. I filled it up with lots of things, see the photo below.

Side panel pocket with convertible, multi-use pouch
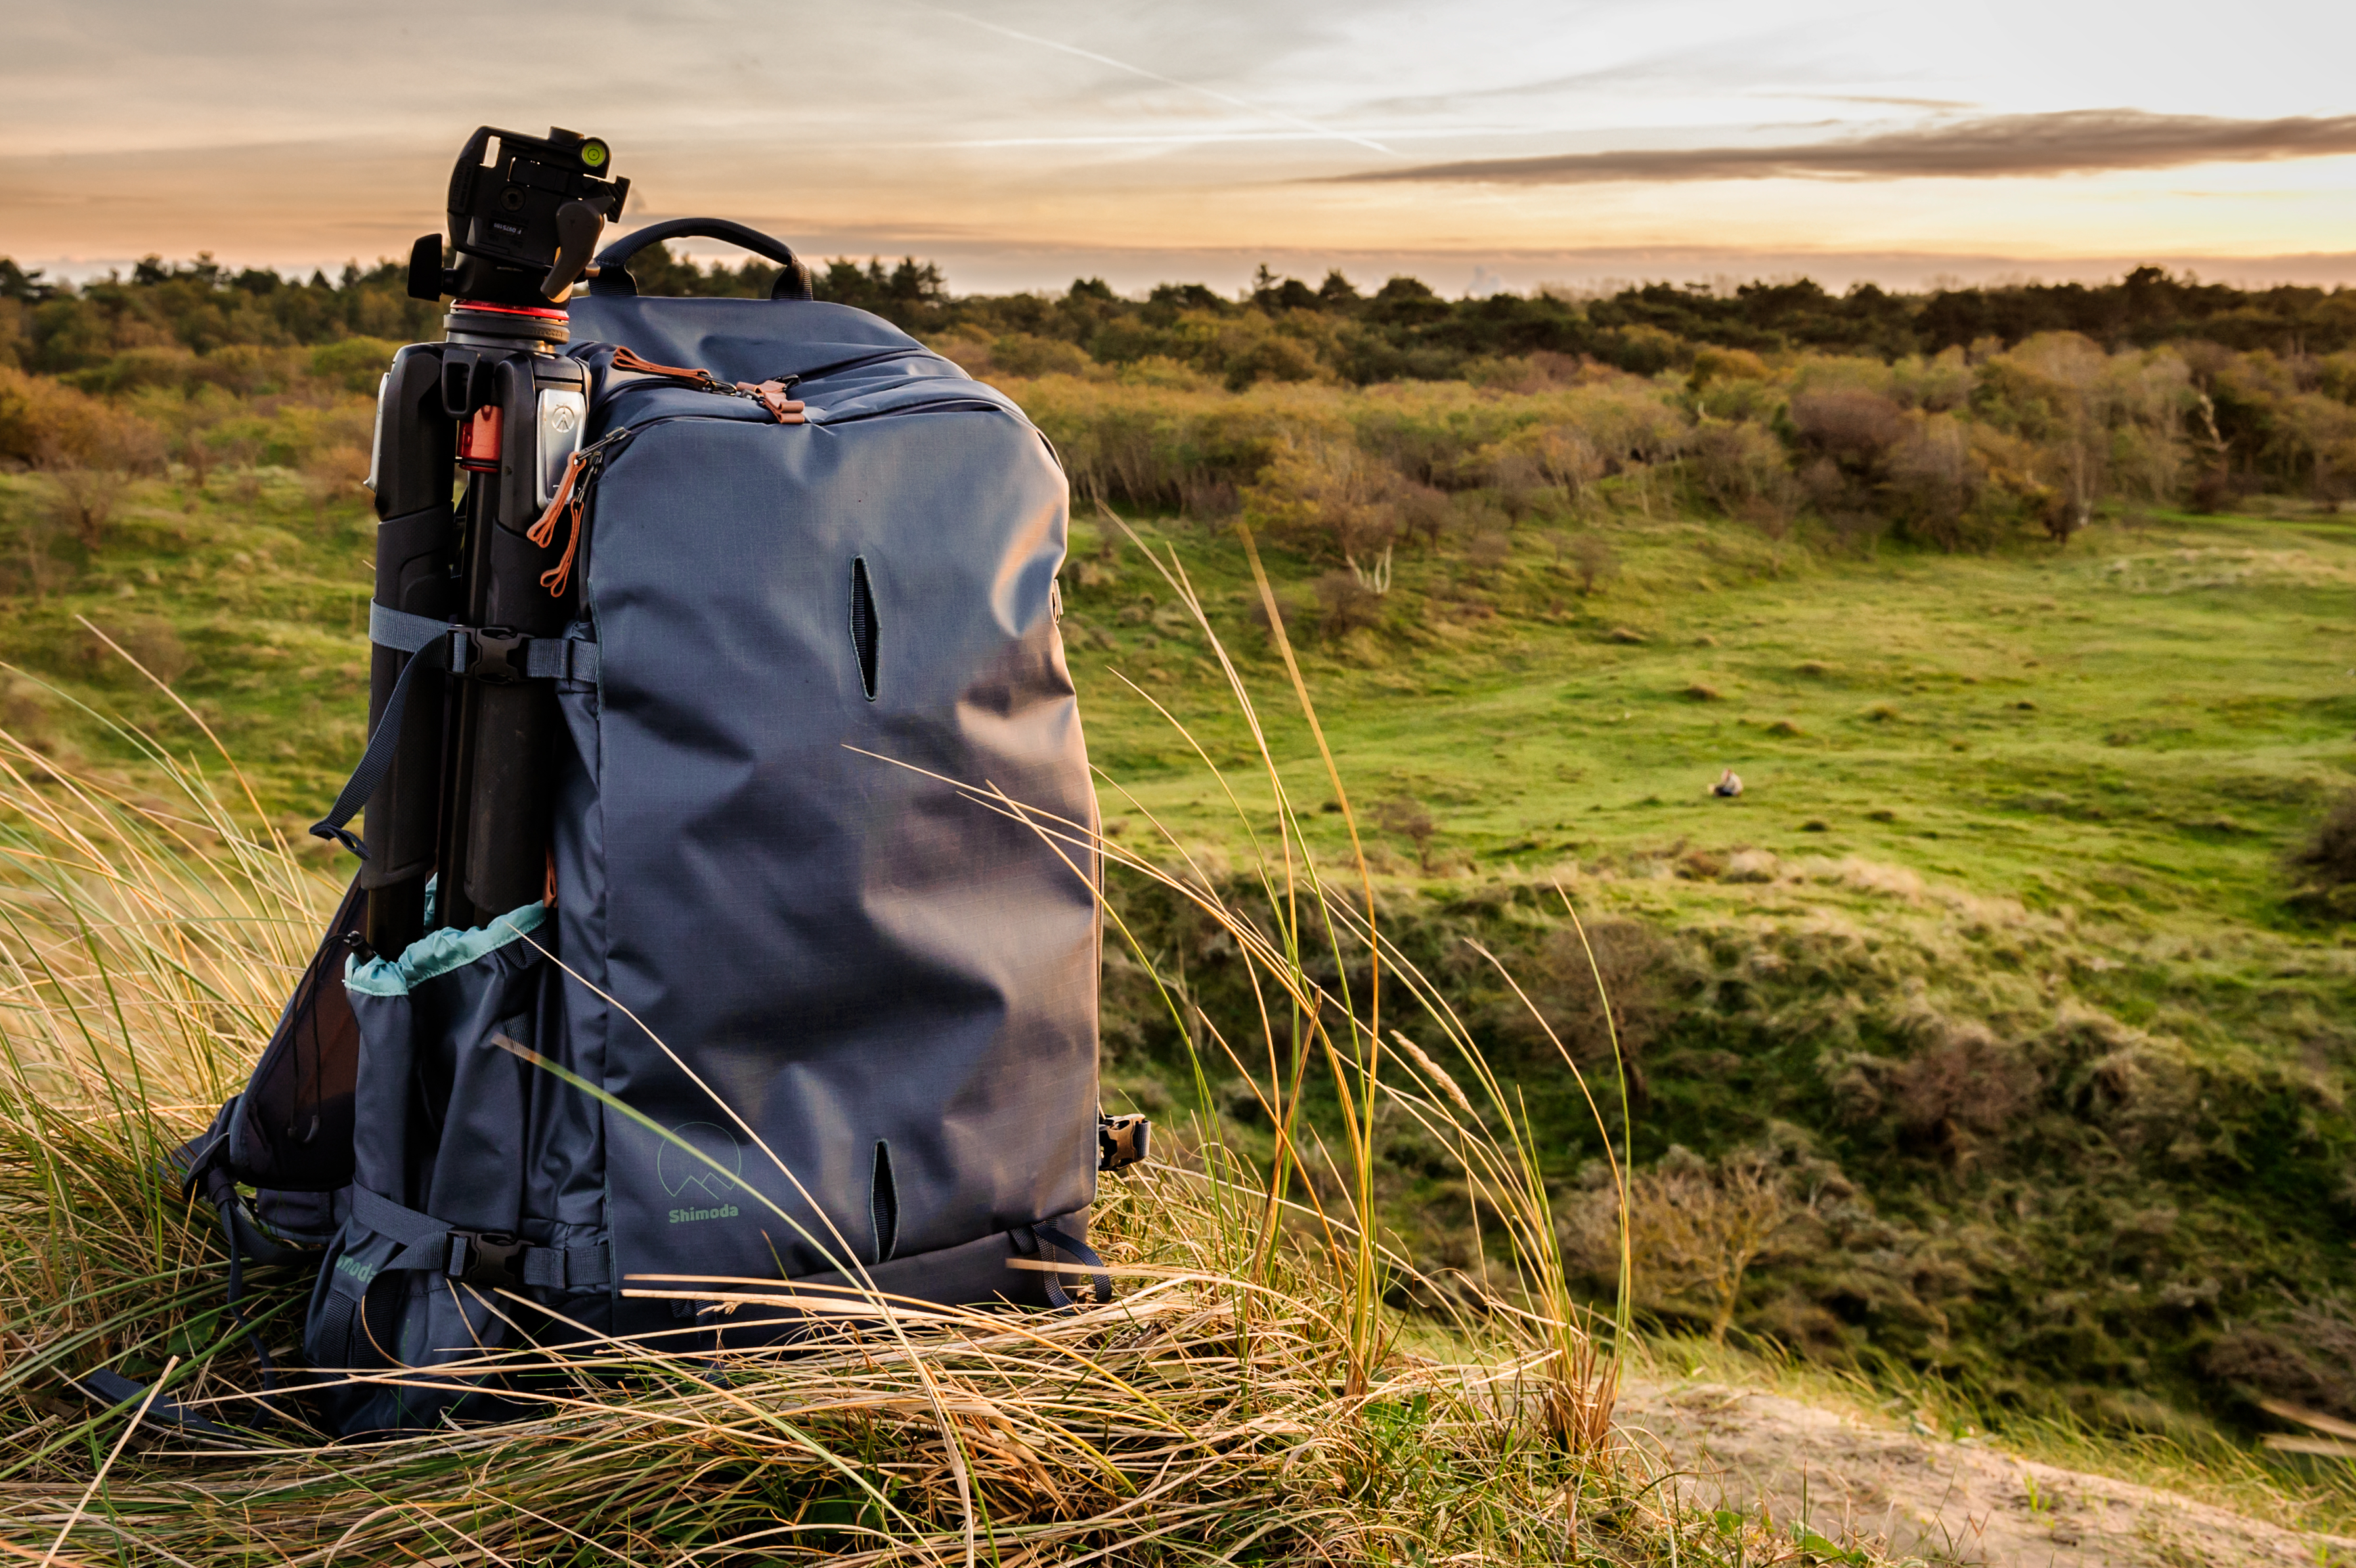
The Shimoda backpacks are equipped with a removable pouch in the side panel pocket. The pouch can secure a tripod on the side of the backpack or it can be mounted to your chest with the included straps and act as a drop-in holster. It can carry up a prosumer body with a 70-200 pro lens. I have’t tried this last feature myself, but you can see this explained in one of the Shimoda product videos at the end of this post. I did carry my Manfrotto tripod securely in the pouch as you can see on my photo below. It was taken at golden hour during a trip in the beautiful dunes of Heemskerk, The Netherlands.
Side access to the main compartment
The side opening is ideal for quick, under-the-arm access without completely removing the pack, like a slingshot camera bag. The rear opening allows wide, easy access to the bulk of your gear for less time-sensitive shooting scenarios. Here the small core units would come in handy: you can switch the medium core unit for two small core units. If you place one small core unit with its contents towards the side opening, the main compartment doesn’t have to opened to get your camera out.
You can keep your pack hanging on your right shoulder, open the side zipper on your right side and grab you camera. It’s a nice feature and it works well, but personally I don’t really need it. When I photograph in nature, I take my time to set up my gear. When I’m walking and I want to be ready, I use my BlackRapid Backpack strap secured to the rings on the Explore 40 shoulder straps. On shorter city trips with street photography, I carry my ThinkTank Retrospective shoulder bag.
EVA compression moulded padding
Shimoda packs use EVA (ethyl vinyl acetate) compression moulding techniques to provide superior padding and protection in several areas of the camera bag. The back of the pack, as well as the shoulder straps and waist belt, have the EVA padding. Nothing else to mention here: the material looks durable and feels comfortable.
Video courtesy of Shimoda Designs
Shimoda large accessory case
I can be brief about this case, it’s well made, convenient and it fits nicely in the pack. It has a clam shell opening and it features a TPU window to see what’s inside. There is a side release buckle so you can hang it on your tripod while setting up your gear, for instance. It has a couple of zippered mesh pockets inside.
Video courtesy of Shimoda Designs
The Explore 40 field test
For the last couple of weeks I’ve been using the Shimoda Explore 40 backpack on every hike. I carried different things every time to get a good feel of the pack in all kinds of situations. The maximum load I carried was 13 kg including the backpack that weighs 1.3 kg. On that hike, I carried the pack with my gripped DSLR, 2 pro zoom lenses, filters, L-plate and accessories, water 1,5 liters, food for a day, a sweater, several small items like sunglasses and my 3kg Manfrotto tripod with pro ball head. I can’t imagine to be carrying more in this backpack, apart from maybe an extra water bottle or two. However, some people may easily add an extra kilo or three without breaking their backs. If you go on longer or multi-day hikes you may prefer the Explore 60, it adds another 20 liters of volume to this model.

Photo: Marloes Bloedjes
Autumn in The Netherlands has ever changing weather conditions, varying from pretty comfortable and sunny weather with spectaculair sunrise and sunset skies to very uncomfortable stormy weather with long and ice cold rain showers. The Shimoda Explore 40 and I have been through all these conditions. I can say that the quality of this backpack really surprised me in a positive way, it is very durable and ultra comfortable!
In the rain, the Explore perfectly held its ground. I mentioned before that it withstood a long and heavy rain shower when I was scouting for some typical Dutch windmill scenes. Just an hour into my hike, the floodgates of heaven opened and within minutes I was totally soaked. Unfortunately, I had delayed waxing my coat and pants a day too long and soon I felt rain water entering everywhere. I held my breath for the gear in my backpack, but Ian Miller’s promise about the supreme coating of the Shimoda Explore 40 made me relax just enough. I had to trust Ian and I trusted this backpack. When I took my camera out to photograph a nice windmill scene in the pouring rain, I noticed a completely dry interior of my main compartment. After the walk and back in the dry environment of my car’s interior, I openend the other pockets. All was dry!
-update 2017-12-20: Ian told me that there will be an additional rain cover for the Shimoda Explore 40. Although I don’t think I’ll ever need it, it may be good to have one when you are living in areas where there can be longer periods of rain, like in monsoon season-
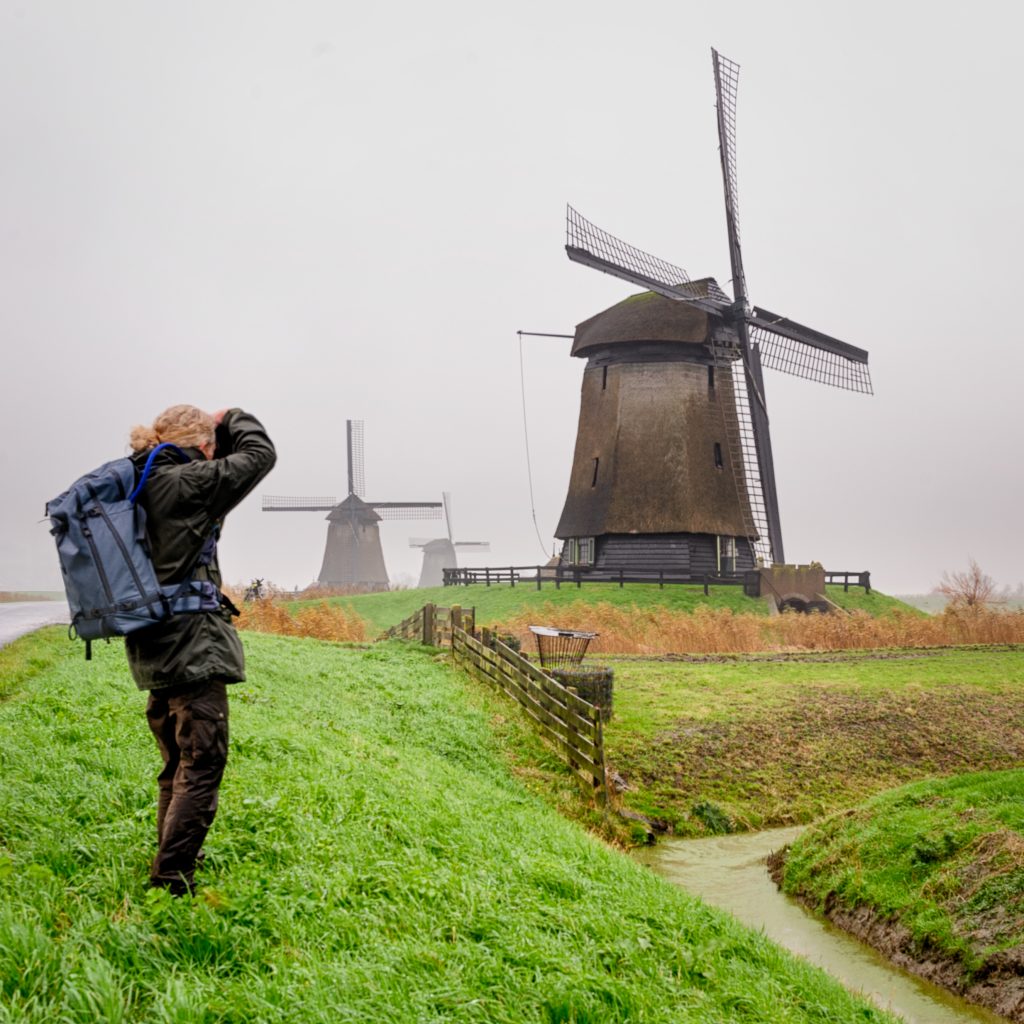
Soaking wet, except the contents of the Shimoda Explore 40!
Where some of the latest F-Stop backpacks have that typical crinkly sound when walking with them, the Shimoda Explore 40 has a kind of rubbery sound due to the resin-coated shell. I found that much less bothersome overall and more befitting when I tried to get close to animals; I could photograph them way before they heard me coming.

During my weeks of testing I made some small strap adjustments for a snug fit. I now have found the optimal settings. When I’m going for a hike, I grab the Core Unit off the shelf, fill it up with the necessary items, insert in in the pack and there we go! To where? Check my galleries!
Two very nice aspects of the Shimoda Explore series are the looks and colours. My beautiful ‘Blue Nights’ Shimoda Explore 40 doesn’t look like a camera backpack at all. It is as stealthy as a pack this size can be. When I’m not carrying my tripod on day trips in Amsterdam for instance, I just look like the average tourist, not like a photographer with a branded pack on his back that invites: I have expensive gear in me, grab me! At least for some time my gear and I will be safe. When the Shimoda brand will be better known however -and it will soon- the smarter thugs will probably be recognising it too…
Shimoda Explore 40 compared to F-Stop Loka UL
My good friend Tomas (check his fantastic work on Instagram) carries an 37 l. F-Stop Loka UL on his photography trips, to his satisfaction. We spent some time comparing the two backpacks and we took some pictures for you to compare. I have been carrying an F-Stop Lotus and a Loka UL on loan for a while and although they are great backpacks, I do prefer the Shimoda Explore 40. I can feel the evolution in backpack design and I can feel the countless hours, experience and passion that Ian Millar has put in his backpack.
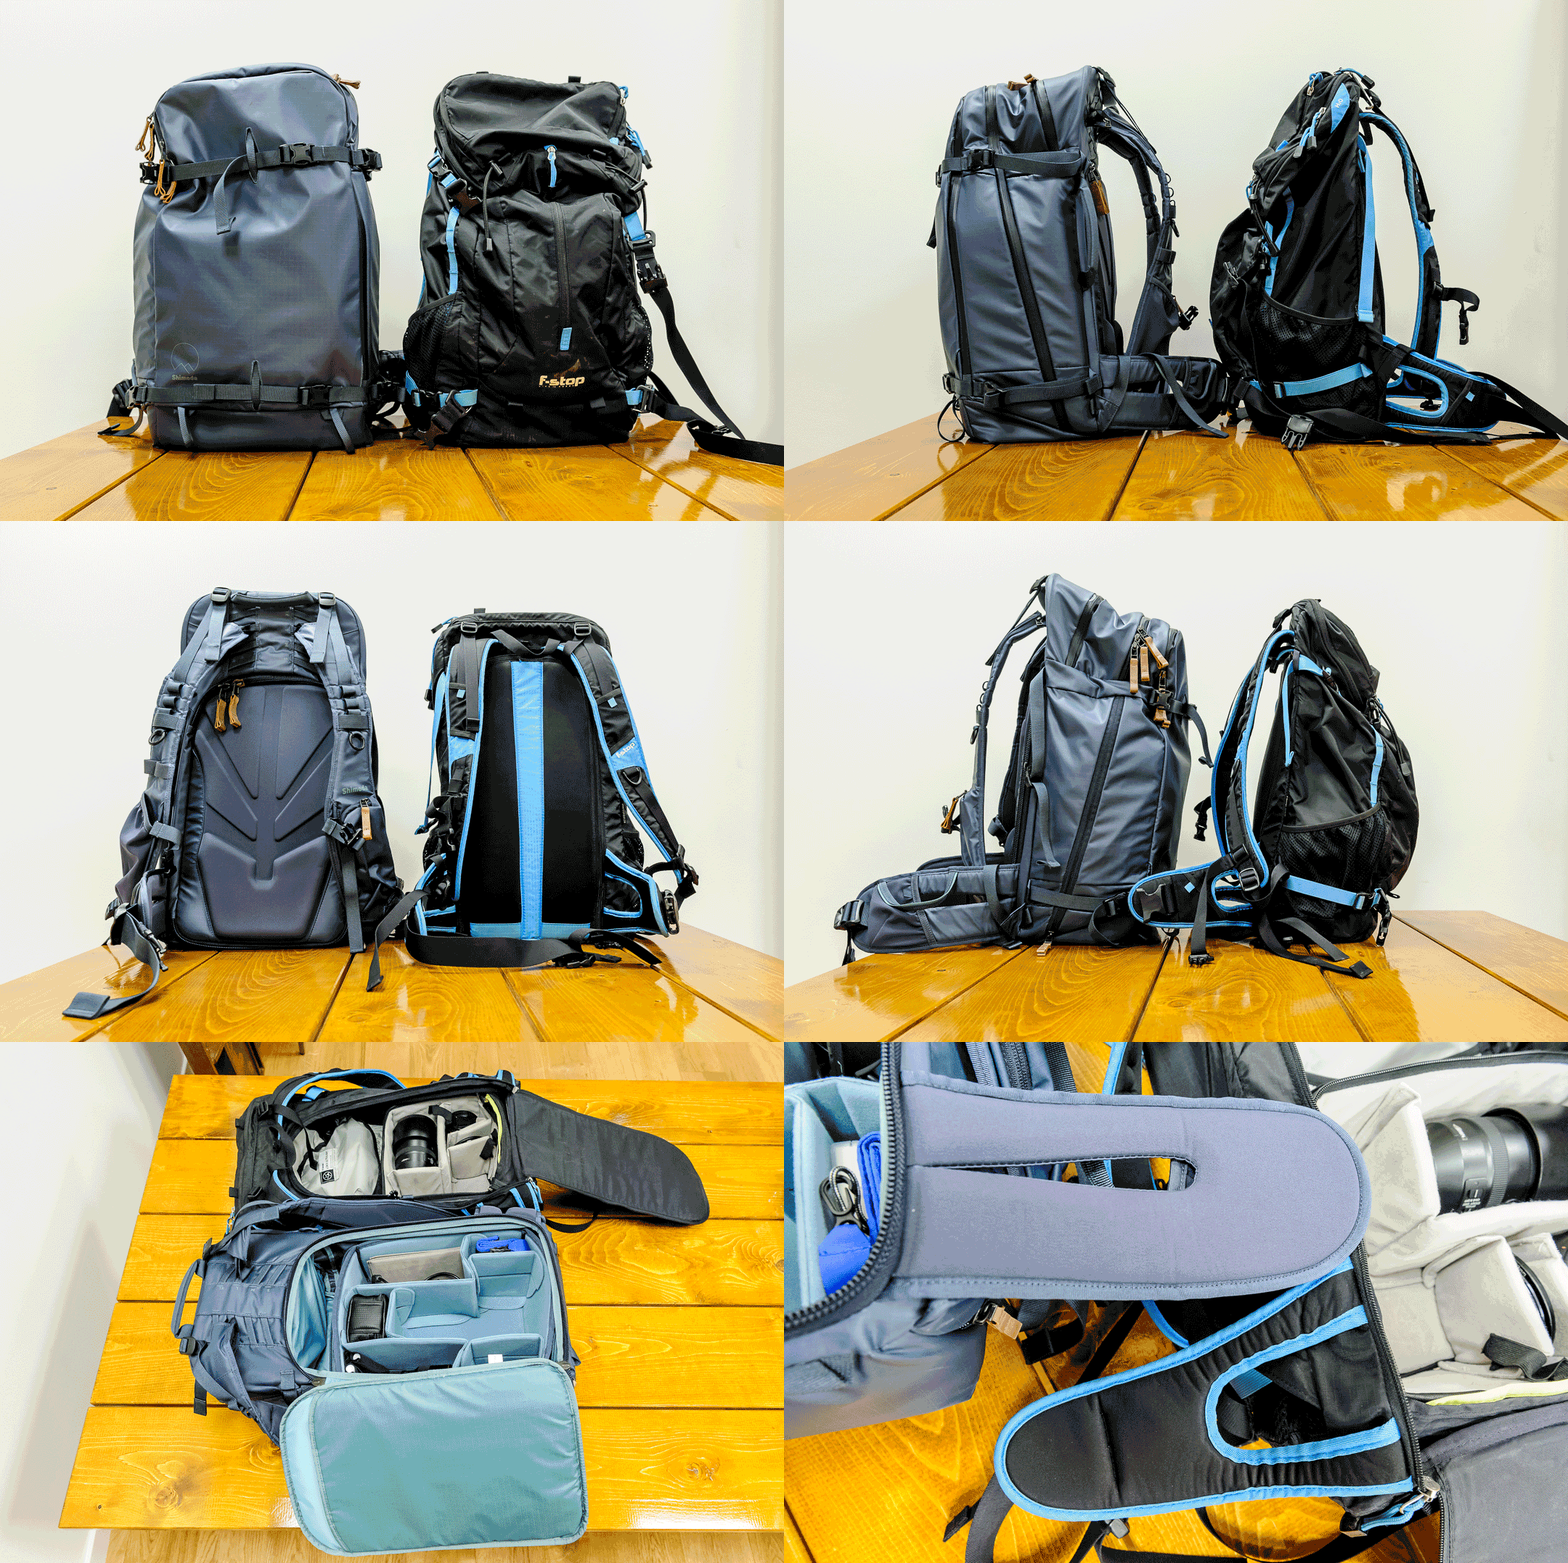
Thanks to my friend Tomas for the side-by-side
Is there anything less perfect about this camera backpack?
Only the test of time will prove either I’m right or wrong on this subject. The buckle on the waist belt is smaller and thinner than you would expect on a sturdy backpack like this. It doesn’t seem fragile though, but I would have liked it a bit more rugged. I am sure that Shimoda wouldn’t put a weak buckle on a backpack this good.
Another point is that the zippers of two pockets are partially blocked by the straps. This is a thing that we also encounter with other backpacks and I think it’s almost impossible to avoid when you use straps in this way, so to me it doesn’t really matter that much.
The front lid has vertical slits in it so there is the possibility for sand, water or dirt to enter and accumulate. The sand and dirt can and will enter when you put the bag down on the front side whilst getting things out of the main camera compartment. The water may be disposed of by the little venting holes in the bottom of the front lid, but I couldn’t find any quick solution for the sand or dirt to be removed.
In my opinion, the phone pocket on the shoulder strap may have been just a bit bigger, in order to be able to accommodate the largest smartphone.
A minor issue happens when I close the padded lid of the main compartment on the back side. The rim of the lid, just under the zipper, is a little bigger than the lid itself. Therefore, upon closing the rim sometimes gets caught in the zipper. I couldn’t yet verify if this was the designer’s intention.
A thing that concerns me slightly is that the Shimoda Explore 40 backpack exceeds the maximum sizes for carry-on luggage on European airlines. It is technically not allowed on any of these airlines. I learned that carry-on luggage specifications on our continent are more limited than they are on other continents. Although you’ll probably get away with an oversized pack on most airlines, I know that some airlines are increasingly limiting their carry-on space and that they will check sizes thoroughly. I have seen templates at the counter in certain airports where you have to put you carry-on luggage in before you can check in. I noticed airline people walking the waiting lines and pick people with luggage that they think is oversized. Until now, I have never been tested because I carry my backpack on my back, I think. I will take the Explore 40 on my next European trip and I will see what happens. The pack can of course be squeezed a bit, so this will probably help to get us on board.
Conclusion
Shimoda Designs states:
“The Shimoda Explore camera bag system was born as a result of the pain, fatigue, and suffering we and our adventure photographer friends inevitably found ourselves facing in the mountains. We needed a better adventure camera bag. So we made one. Shimoda bags are built to stand up to the most extreme mountain terrain that we love to deal with.”
Although the tallest mountain I ‘climbed’ during my Dutch hikes was about 18 meters high, I can honestly say from my personal findings that Shimoda has delivered a truly amazing, comfortable and versatile backpack for photographers. The Explore 40 passed the Dutch hiking and weather test with the highest personal score I have ever given any other backpack. This top quality backpack is just so comfortable because of the used materials, the endless adjustability and the perfect size for longer walks.
Considering that the model I received is a pre-production model, it already is splendidly finished altogether with so much eye for detail, as if Ian himself had stitched this pack together.
For now, I no longer feel like the Princess and the Pea when it comes to finding the the ultimate camera backpack. Finally my quest to find one is over. Unless of course I find a reason to need a bigger backpack to use on multi-day hikes or expeditions. But when that time comes, and that is hopefully soon, I know the Shimoda Explore 60 with its 20 liter added volume is the backpack I am going to buy. At this time though, I will snugly carry my Shimoda Explore 40 with confidence on many, many beautiful miles.
Shimoda launch Explore 40 and Explore 60 on kickstarter
By the end of 2017, Shimoda launched their Explore 40 and Explore 60 camera backpacks on Kickstarter and their campaign quickly was funded. Along with the new backpacks, they also introduced their medium and small core units and the small, medium and large accessory cases. On top of that, it surprised me to see that they also offer an Explore Carry-On Roller. Ian has been busy!
You can choose from different sets:
Shimoda Explore 40 Starter kit, backpack, two small core units
Shimoda Explore 40 Pro kit, backpack, one medium and two small core units, medium accessory case
Shimoda Explore 60 Starter kit, backpack, two small core units Shimoda Explore 60 Pro kit, backpack, one medium and two small core units, medium accessory case
And many more.
Disclaimer: Shimoda provided me with a test model of the Shimoda Explore 40 camera backpack for this review, which I was allowed to keep. The opinions above are my own. I would always write down details about flaws or shortcomings, because I wouldn’t want you to choose the wrong backpack, especially when it’s quite expensive as these types of backpacks are.
Update Feb 2018:
Shimoda has extended their line-up with a 30 liter backpack, the Shimoda Explore 30. The Shimoda Kickstarter project is no longer active, if you would like to order a Shimoda backpack, please click one of the links below to visit Adorama. If you would buy through one of these affiliate links, you would support my work a little. Thank you!
Update Jan 2019:
Shimoda now lso offers a rain protection cover for extra extra protection.
Update Feb 2019:
The backpack was rejected for cabin luggage on an Alitalia flight to Milan. I also traveled to Barcelona with KLM and the backpack was accepted as cabin luggage.
Update May 2019:
I purchased the Adorama for the latest price deals on the Shimoda Explore photography backpacks:
Shimoda Explore 30 backpack – Blue Nights
on Adorama
Shimoda Explore 30 backpack – Sea Pine
on Adorama
Shimoda Explore 40 backpack – Blue Nights
on Adorama
Shimoda Explore 40 backpack – Sea Pine
on Adorama
Shimoda Explore 60 backpack – Blue Nights
on Adorama
Shimoda Explore 60 backpack – Sea Pine
on Adorama
Shimoda Explore 40 40 Liter Adventure Backpack Starter Kit with 2 Small Core Units for Camera and Up to 13″ Laptop, Blue Nights on Adorama
Shimoda Explore 60 60 Liter Adventure Backpack Starter Kit with 2 Small Core Units for Camera and Up to 13″ Laptop, Blue Nights on Adorama


Thank you for sharing this helpful review!
You are very welcome, glad it served you!
Thanks for comprehensive review.
Have you had any issues getting the bag on to European flights. If the bag was gate checked would the internal camera units provide enough protection to remove and take on as hand luggage?
Thanks
Geoff
Hi Geoff,
I took it once on a flight with KLM to Barcelona and there were no issues. Not sure if they would accept it if the flight was busier, because this flight was 2/3 filled. Lots of protection with the camera units!